While it’s true that Macs come with loads of great software that can help you get most things done out of the box, it won’t be long before you need to add your own favourite programs to the Dock at the bottom of your screen. Here’s how to download and install apps from the Mac App Store or directly from the developer’s website, plus we’ll discuss what to do if you can’t install the software to your Mac.
Before we explain how to download and install apps, we’ll start off by explaining how to use the Mac App Store to find the apps you require.
How to find apps on the Mac App Store
The easiest way to download and install an app is by using Apple’s own App Store.
- You’ll find the Mac App Store in your Dock (the row of icons at the bottom of the desktop), just look for the blue icon with an A inside that looks like it’s made up of white sticks.
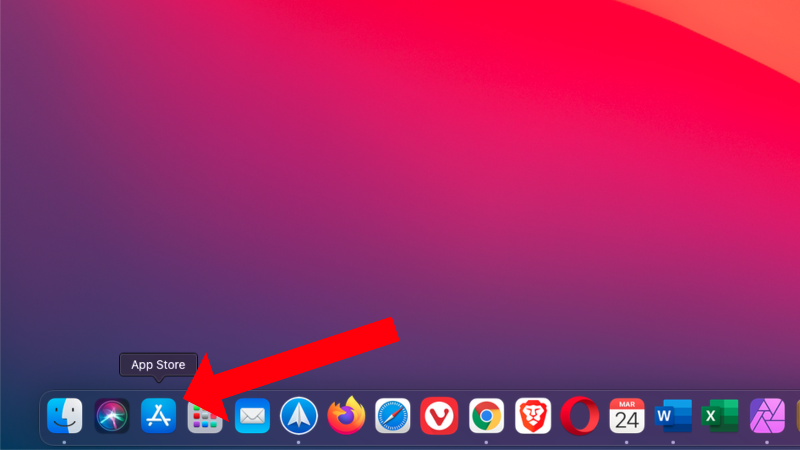
- Click on the icon to open up the Mac App Store.
- You should automatically be logged in with your Apple ID (see the bottom left corner). If not, enter the details when prompted. If you don’t already have an Apple ID you will need to create one. Read: How to create an Apple ID.
- Now you can peruse the various options on the store. The left-hand column has section headings to make it easier to find apps for certain purposes, for example click on Play to find games, Create for creative apps, Work for business applications, and so on.
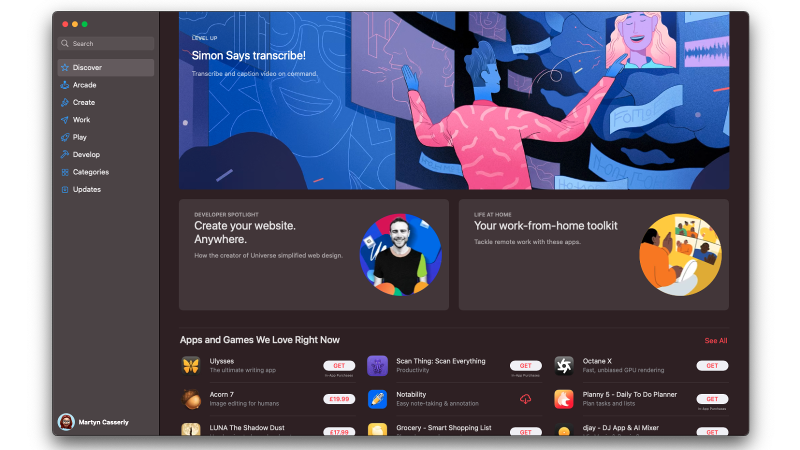
- Alternatively select Categories for even more app catgories to choose from, e.g. Music, Weather, News, Social Networking, Education, and so on.
- If you know the name of the app you’re after just type that into the Search box at the top of the window and press enter. This kind of search often brings up similar apps as well as the one you are looking for.
- The resuts you see will be divided in to Free Apps and Paid Apps. But beware that when it says it’s ‘Free’ there is often an In-App Purchase associated with the app that could make it more expensive than an alternative option.
- When you see an app that interests you, click on its icon to open the dedicated page. This will outline the various functions, display user reviews, and have some screenshots so you can see what it looks like.
- Scroll down further, to the section entitled Information, and you’ll also find the size of the file, whether it’s compatible with your Mac, plus any addition in-app purchases there may be. The latter is usually the form of Premium accounts that unlock additional features.
How to install apps from the Mac App Store
Once you have found the app you want to install on the Mac App Store installing it is simple:
- If the app is free click the Get button. (Or, if you’ve installed the app on previous Macs, rather than a Get button you will see a cloud icon that has an arrow pointing down from its centre, so click that instead).
- If this is an app you need to pay for there will be an amount inside the button so that you know that you’re about to spend money, click this.
- Once you’ve clicked the button, the word Install will appear. Click this and your Mac will automatically download the app.
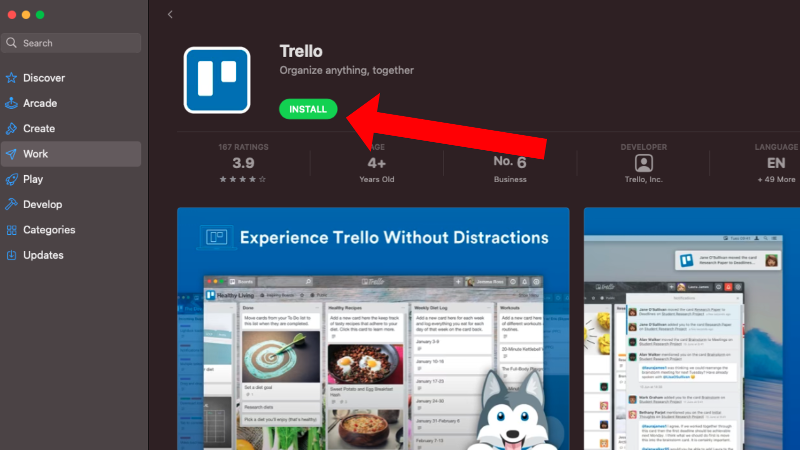
- You will see a new animation that indicate how the installation is progressing. If you want to stop the download/install at any time, just click the square in the middle of the circle.
How to find the app you downloaded
Once the install is finished you can search for the new app by using Spotlight.
- Press Command + Space to open Spotlight and start to type the app’s name.
- When the app appears in Spotlight press enter to open it.
- Once the app opens it will appear in your Dock – if you want to keep it in the Dock right click on the Icon and choose Options > Keep In Dock.
Another way to locate the app is to click the Launchpad button (probably F4 on your keyboard) to display all your installed apps.
How to download apps from the web
The Mac App Store has a huge selection of apps, but not all developers host their creations there. Apple takes a hefty slice of the price of apps when they appear on its platform, so some developers prefer to go directly to customers instead. You may also find that some non-App Store versions have additional functionality or features, so it’s worth checking them out. If you know that an app is made by a small team, you should also consider supporting them by buying direct rather than propping up a huge corporation. It’s the digital equivalent of shopping locally.
To install an app from the web, visit the site of the app in question and you should see an option to download it somewhere. For example, in the image below you’ll see the home page for the excellent Fantastical calendar app. Below the main image you’ll see there’s an option to Download Now. This will be a pattern that you should see on all non-App store apps.
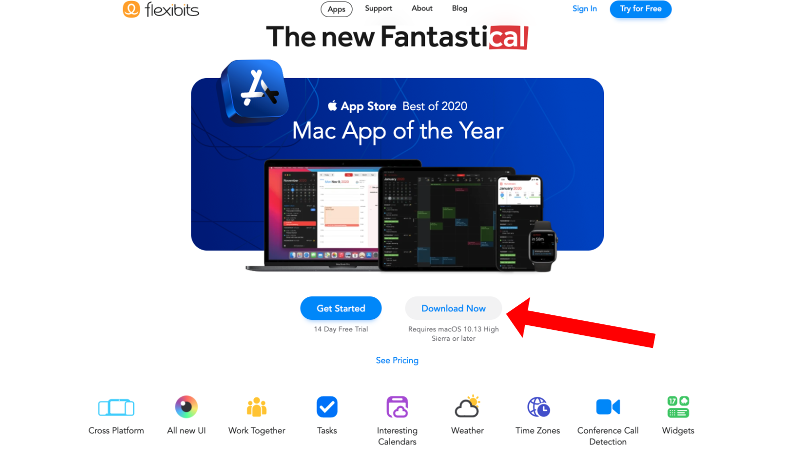
- Click the Download Now button (or equivalent) and you should see a bar appear at the bottom of the screen with an icon inside indicating that the app is downloading.
- The file will either download to your Downloads folder, which you can find in the Dock. Or, in newer versions of Safari, you will see it in Safari Downloads (the icon for which is a circle with an arrow inside). We prefer to download straight to our Downloads folder, so right click on the Download Now and Choose Download Linked File As and change Where to to Downloads.
- Usually the name will have .zip at the end as this is a Zip file which compresses the file, making the size smaller, so that it downloads faster.
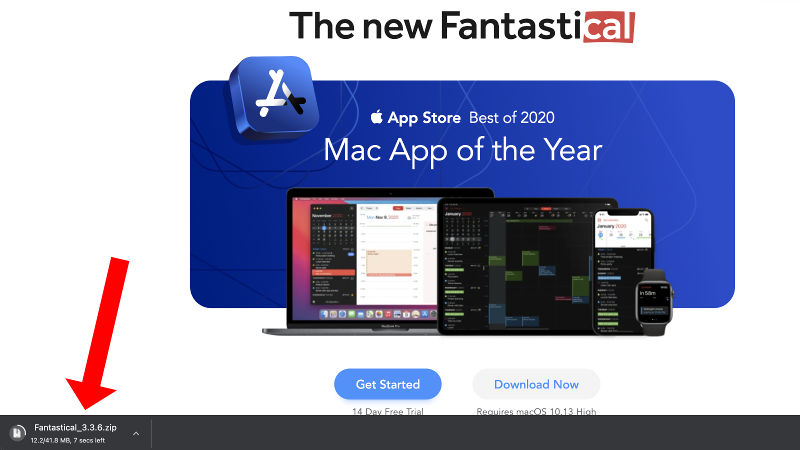
- Once the app has downloaded you’ll be able to click on it to install it. For .zip files, double clicking will unzip the file, then you’ll need to double click it again to install it.
- If the file has .dmg at the end, then it isn’t compressed and double-clicking will begin the install immediately.
How to install apps from the web
Apple makes it a bit easier to install apps from the Mac App Store because the company is confident it has checked that the app is safe and secure. If you are installing an app from the web it is a little more complex because Apple wants to remind you to check you are sure the app is safe.
That’s not to say that Apple is handing over the responsibility to you. There are three types of apps you could be downloading from the web: an app made by an Apple certified developer (which should be safe), an app that isn’t certified (but you are sure is safe), or an app that isn’t safe at all and you shouldn’t install it. As we explain in our run through of how Apple makes sure Macs are secure, Apple has various measures to ensure you can’t install unsafe apps. One is Gatekeeper, which checks that the developer has a certificate issued by Apple, the other is XProtect, which is like Apple’s inbuilt antivirus software that blocks anything that has malicious code.
- The first step in installing the software will be to click on the downloaded file, which as we said above will either be a DMG or a zip. Double click on the file and the first thing you will probably see is a message like the one below warning saying that “[App Name]” is an app downloaded from the internet. Are you sure you want to open it?
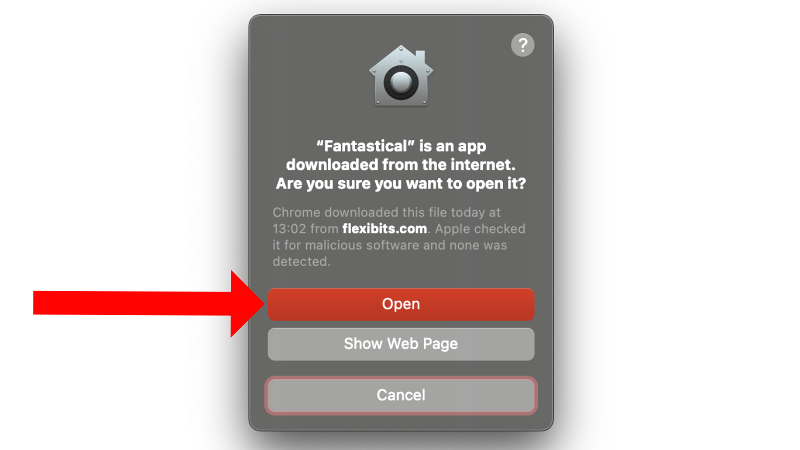
- Click Open and the install will begin.
- You may be taken through an install wizard, with macOS indicating you should drag the app into the Application folder. Simply drag the app onto the folder icon then let go of the mouse button to complete the process. Now, you should find the app is ready to use when you click the Launchpad button in the dock.
If you see a warning stating that the app is from an ‘unidentified developer’ then you’ll need to tweak your security settings to be able to install the app. Read how to open a Mac app from an unidentified developer for advice on how to do this.
How to install unsupported apps
Sometimes you may not be able to install an app because the version of macOS you are running doesn’t support it.
Some older apps won’t work with recent versions of macOS. For example, Apple stopped supporting 32-bit versions of apps in macoS Catalina, which meant a number of apps no longer work if you install that version of macOS or any that followed it (Big Sur). Read: Apps that won’t work in Catalina. We have more information about what to do if your software ages out and some helpful tips in what to do about Apple’s Not Optimised & Needs To Be Updated warnings.
Alternatively it might be that there isn’t a Mac version of the app you want to run. In that case you could use a virtual machine software such as Parallels Desktop or VMware Fusion to run Windows on your Mac (as long as it isn’t an M1 Mac). Read: Best virtual machine software for Mac and How to run Windows on the Mac. We also have a guide to running Windows apps on your Mac with Crossover, which enbles you to run Windows apps without running Windows!
How to update Mac apps
Once you’ve installed your app, you’ll want to make sure you’re always using the latest version – this will help you avoid problems with the security of the app and any issues that might be caused by bugs and other changes.
You can enable automatic updates on the App Store so that your apps will be updated as soon as an update is issued. You can also set up your Mac to check for non-App store updates too. We explain how to achieve both of these scenarios in how to update all your Mac apps.
How to delete apps
Finally, if you decide that the app you’ve added to your system isn’t really what you were after, you’ll want to remove it to stop the files taking up valuable storage space. For this, you’ll want to read our step-by-step guide on how to uninstall Mac apps.


