Children under the age of 13 are unable to create Apple IDs themselves, although a parent or guardian can create one for them as part of the Family Sharing system, detailed below. This also allows a parent or guardian to put a credit card against the account for the child to use to make purchases – with supervision, of course.
Once you’ve set up Family Sharing, on your iPhone/iPad/iPod touch, tap Settings > iCloud > Family, and then Add Family Member. then click the link marked Create An Apple ID For a Child. On a Mac, open System Preferences, click the iCloud icon, then click Manage Family. Click the plus button at the bottom left, then select Create An Apple ID For A Child Who Doesn’t Have An Account.
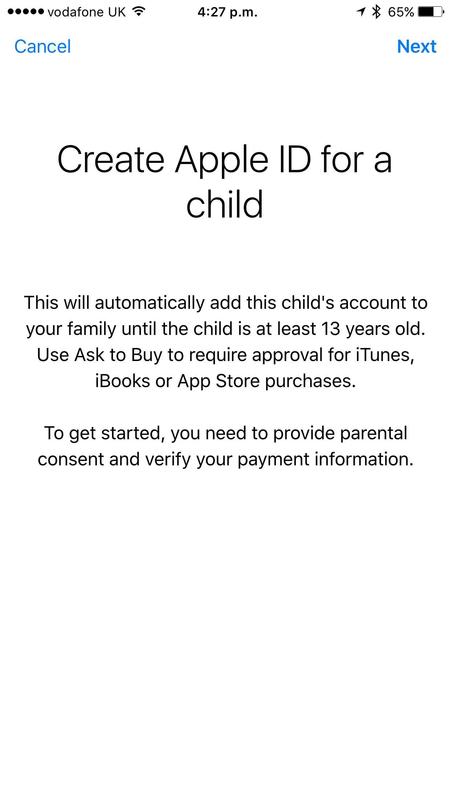
Using the Family Sharing element of iCloud you can create Apple IDs for children under 13 years old
Note that you can’t set up a child’s Apple ID if there’s no credit or debit card associated with your own Apple ID. You will need to provide the card’s CCV number as part of the setup process. Apple says this is in place to conform with online child protection laws in that it provides verifiable proof of your home address.
Using Family Sharing with a child
Family Sharing, which was introduced back in 2014 alongside iOS 8 and Mac OS X Yosemite, is a handy feature that allows you to easily share apps, music, movies, books and more between the members of your family.
In this article we show how to set up Family Sharing on all your Apple devices. We’ll be working in iOS 12 and macOS Mojave, but the procedure is largely the same for other compatible OS platforms.
Benefits of Family Sharing
Once you’ve set up Family Sharing, you no longer have to buy items individually. When one person in the family buys an app, book or other content from Apple’s digital stores, it’s immediately available to all other members of the family to download for free.
(Usually. App developers and content makers need to activate Family Sharing for their digital media. If they don’t, you won’t be able to share it. But in our experience, most do.)
The family unit can contain up to six people, and you all pay on the same credit card, so the system is ideal for families that want to combine their purchases.
Another advantage is that you can set limits for younger family members, so when a child asks to buy an item an alert appears on an adult’s phone. If you have this option activated, the youngster won’t be able to make the purchase until and unless the family administrator agrees to it.
There are other benefits to turning on Family Sharing. It integrates with other Apple services, such as iCloud and Find My Friends. You can share storage from a single iCloud account. With Family Sharing set up you get a group calendar and reminders lists for your family, so you can organise events together.
Find My Friends can be used to share the location of your family members, making it easier than ever to meet up. And you can all contribute to a shared family photo album that’s accessible (and kept up to date) on each person’s devices.
How to set up Family Sharing on an iPad or iPhone
The easiest way to set up Family Sharing is on an iPad or iPhone. (You can also set up on a Mac – we look at this later in the article – but it’s a bit trickier.)
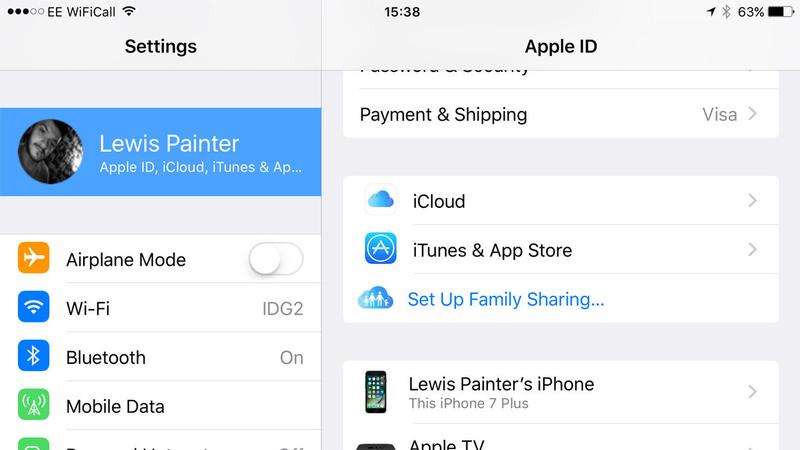
Open the Settings app. At the top you’ll see your name and picture, if you’ve uploaded one. Tap this to see your Apple ID settings. Now tap ‘Set Up Family Sharing…’ (If you’ve already got the service set up, this will just say Family Sharing.)
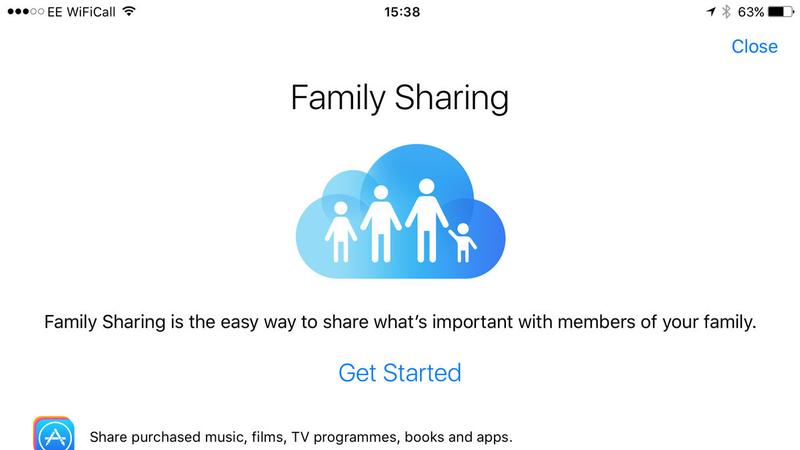
You’ll now see a series of windows that you can breeze through pretty quickly, but if you’re interested, they briefly describe the features you’ll be able to use with Family Sharing, and contain a few warnings about what exactly you’re letting yourself in for – the things you’ll be paying for, primarily. Tap Get Started on the first screen, and then Continue on the second and third ones.
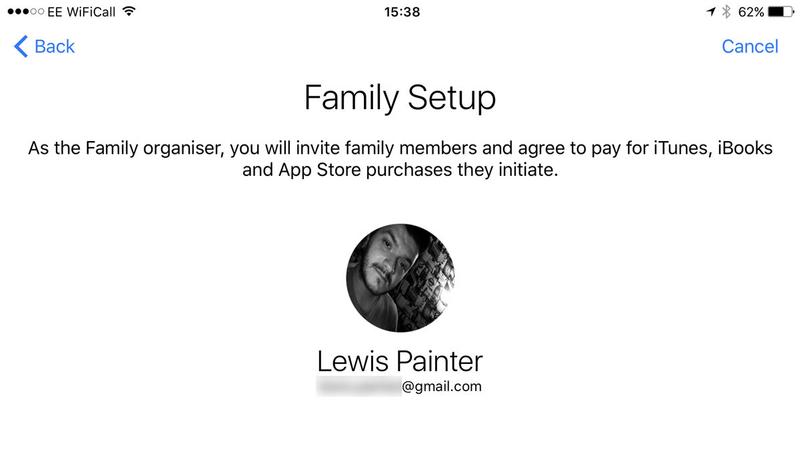
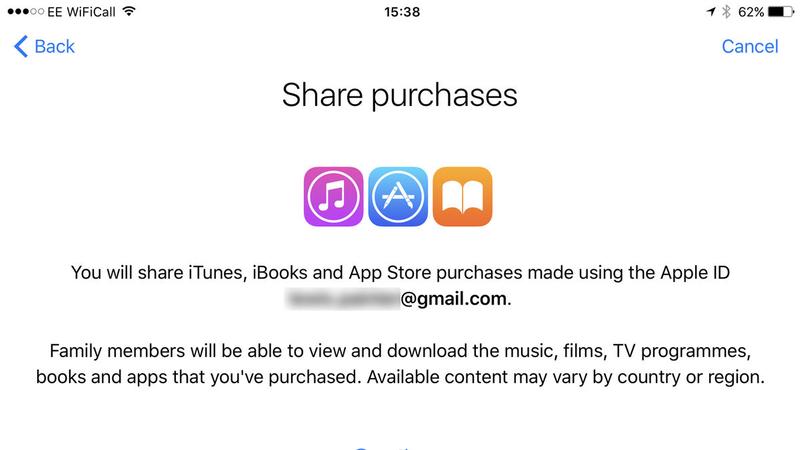
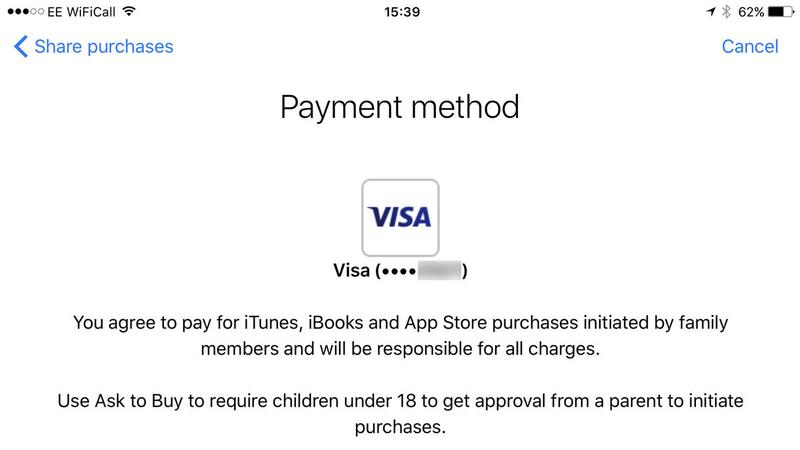
The fourth screen, with the title ‘Payment method’, is very important. This shows the final four digits of the credit/debit card associated with the Apple ID you’re using.
This is the card that will be debited whenever someone who’s part of the family group makes a purchase. Make sure it’s the right one before tapping Continue a third time.
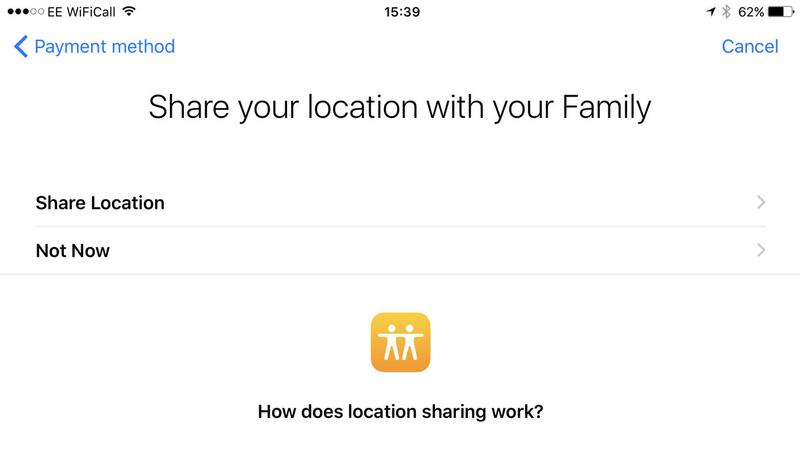
As well as sharing apps and other digital content, Family Sharing allows you to share location data with your family. On the next screen you decide whether your own location data will be shared with other members; when they each accept your invitation, they will in turn choose whether to share their location. (At this point you may wish to give firm instructions as to which option they should choose!)
Select Share Location or Not Now.
And that’s it: your family unit is set up. But for the time being it’s a family of one. Now you need to add further family members.
Add family members on iOS
From the Apple ID screen in Settings, tap Family Sharing (the option that was Set Up Family Sharing before), then Add Family Member. You’ll be given the option to invite them via iMessage or in person, and there’s a special option and process for creating child accounts, since those under 13 are not allowed to create their own Apple ID.
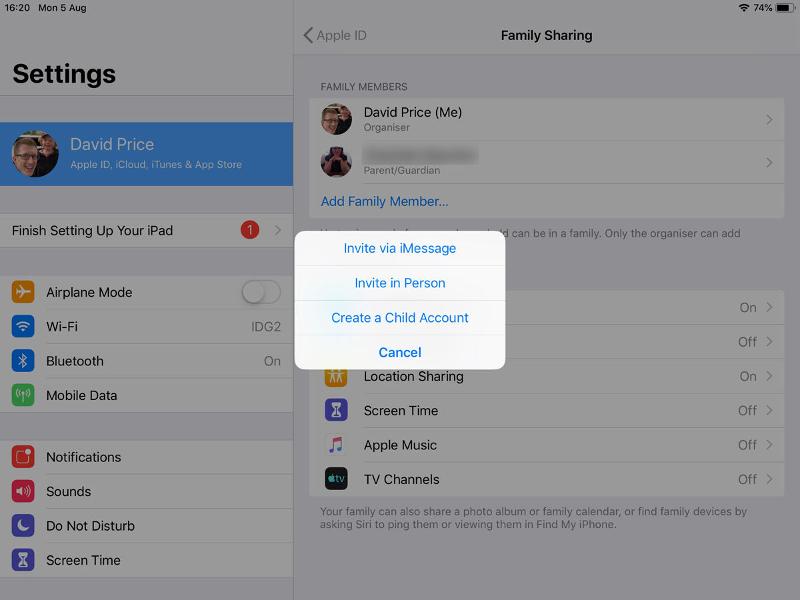
Before sending out invitations you may be asked to verify that you are the family organiser and have the authority to do so. You’ll have to enter the security code for the linked credit or debit card.
If you went for iMessage, iOS will now auto-populate a message for you, containing a brief explanation of what Family Sharing entails and instructions to join the group. You just need to type in the contact details of the prospective family member (if they’re in your contacts list, start typing and they will be auto-suggested), enter any additional explanatory comments and hit send.
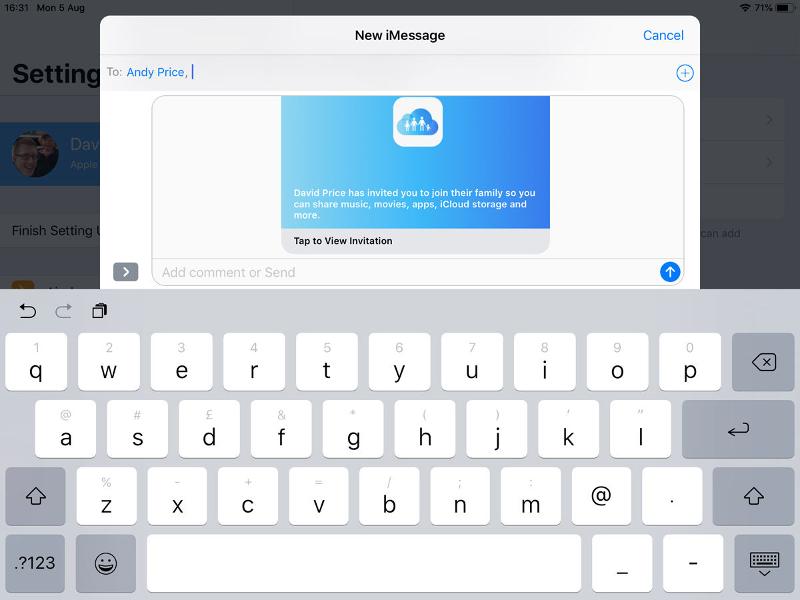
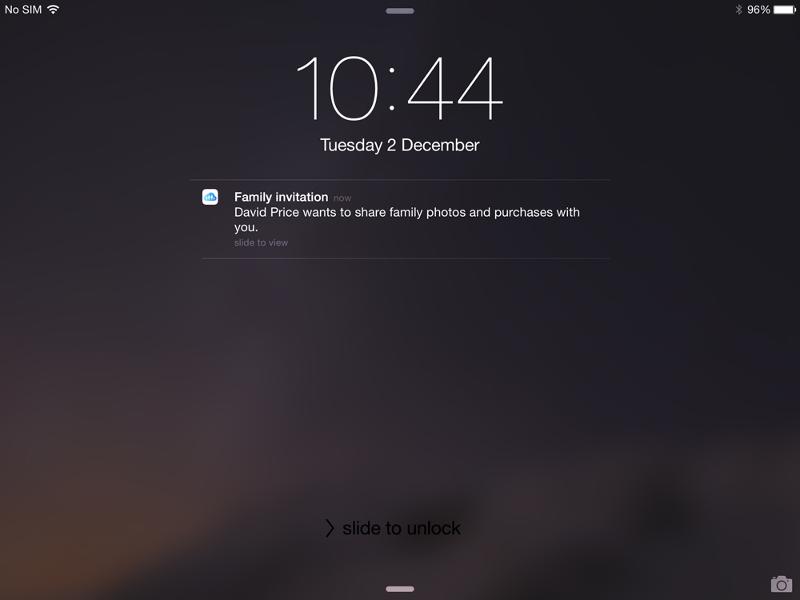
The family member will then receive their invitation, accept (or decline), and select whether to share location data. And you’re ready to go with Family Sharing.
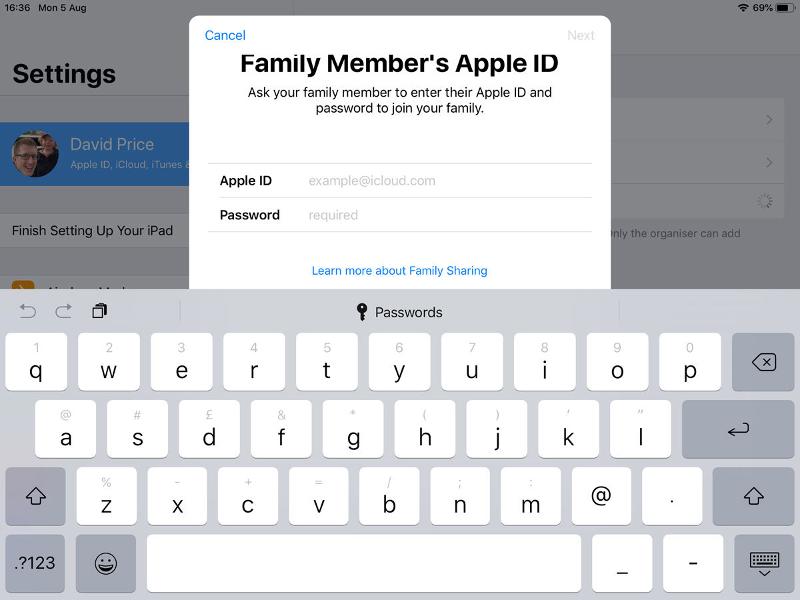
The in-person option, as the name suggests, is for when your family member is right there with you. In this they will have to fill in their Apple ID and password on your iDevice.
How to set up Family Sharing on a Mac
You can also set up Family Sharing via a Mac – again, it’s pretty simple, provided the Mac is running Yosemite or later. Here’s how to set up Family Sharing for all the members of your family on a Mac, as performed on macOS Mojave (but it’s pretty much the same on earlier versions).
- Open System Preferences > iCloud. Tap Sign In and enter your Apple ID and Password.
- Click on Set Up Family.
- Click on Continue and Continue again.
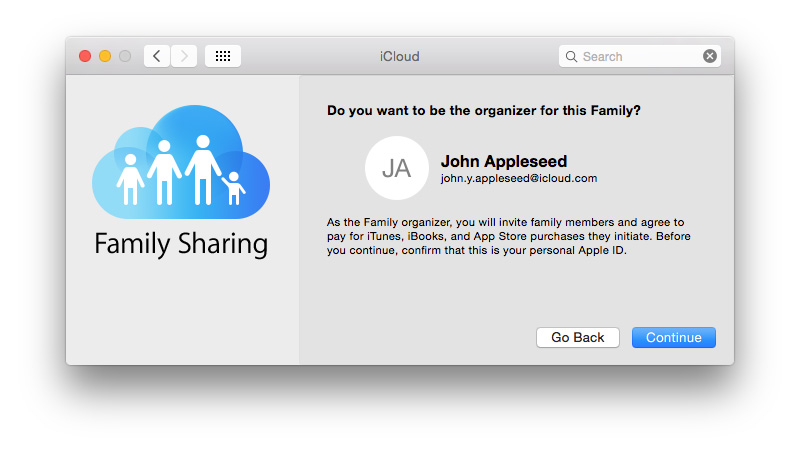
- A window will show the account that you will use to share purchases from. Double-check that it is your main Apple ID account, and click Continue.
- The Purchases Initiated By Your Family window will show which card is being used for payments. Click Continue.
- Click the tick box next to ‘I Agree To The iTunes Store terms and conditions’ and click Agree.
- If you want to use Find My Friends to locate your family, tick the Share Your Location option and Continue (otherwise click Not Now and Continue).
Family Sharing is now set up on your Mac. The next step is to add members to it.
Add family members on macOS
Now that you’ve set up Family Sharing on your Mac, it’s time to add a family member. Here’s how to add people to your family:
- Open System Preferences > iCloud and click on Manage Family.
- Click the plus sign at the bottom left to add a new member of the family.
- Enter the email address for the family member and click Continue. (Alternatively, you can just type in their name, if they’re in your contacts, and select the correct person when suggested. Or even their Game Center nickname.)
- Confirm you’re the family organiser by entering the three-digit CVV security code from the payment card associated with your account. Click Continue.
- Decide how the new member will be invited – either via an emailed invitation or by entering a password right now.
- Enter your Apple ID password and click Continue.
Who pays for content in Family Sharing?
It’s important to note that the person who sets up Family Sharing is the Organiser. This is the person in charge, and they pay for all purchases. So if you set up Family Sharing for your partner and family members, your card is charged for all purchases.
There is also no way for other family members to pay for Family Sharing content. Only the person who originally set up the group can pay (or the card they entered – which could be for a joint account). Other family members can leave Family Sharing if they want to pay for an app, or music, but they can only do so twice a year. So make sure you are happy to pay for all content in Family Sharing when you set it up.
