While we all value our privacy, it’s also good to know that if something should happen to us, our friends and family would know where we were. Or, if you’re wondering where a friend is when they said they’d meet outside the cinema twenty minutes ago, you can quickly monitor their progress. There’s plenty of reasons to share your location with a chosen few, and here’s a few ways to achieve this on your iPhone.
Enabling Location Services
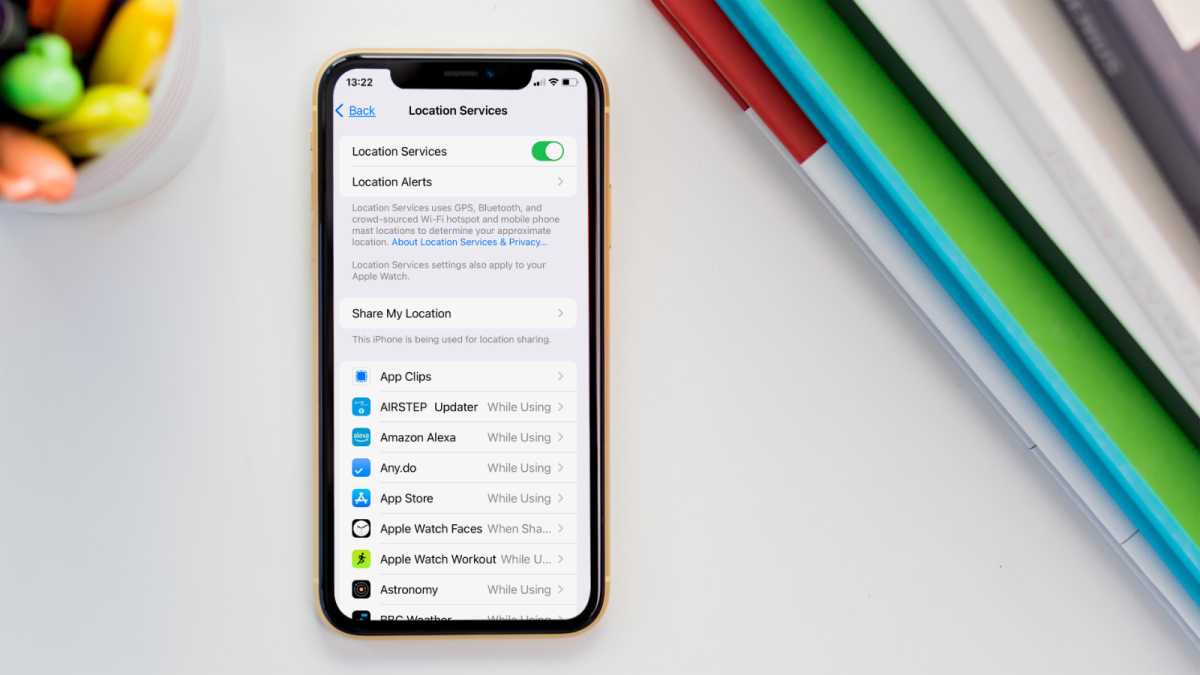
To be able to use the location sharing features on your iPhone, you’ll first need to make sure that a few related settings are turned on. Here’s how to check whether they are enabled or not.
- Open Settings > Privacy & Security
- Select Location Services
- Enable Location Services
- Tap Share My Location
- Turn on Find My iPhone and Share My Location
Martyn Casserly
With those all in place, you’re good to go.
Share your location via the Contacts app
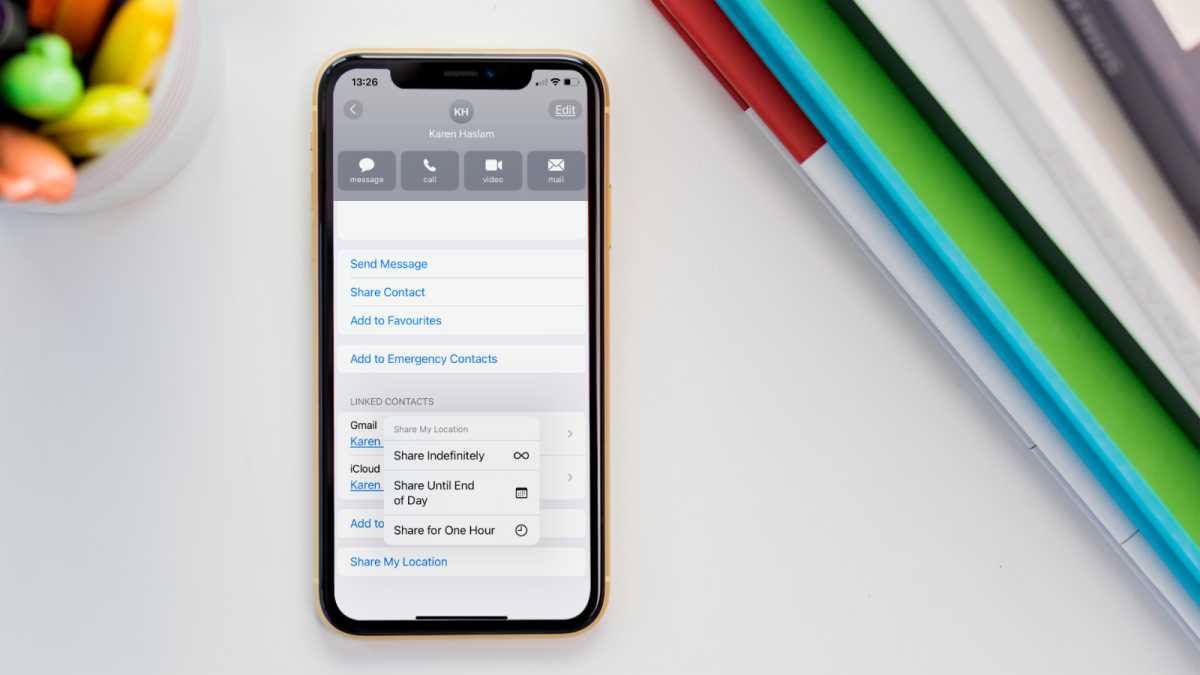
A quick way to share your location with a person is via the Contacts app.
- Open Contacts and select the person with whom you wish to share your location
- Scroll down the contact card and select Share My Location
- Select how long you want to share (Indefinitely, Until the End of Day or One Hour)
Martyn Casserly
Share your location via the Messages app
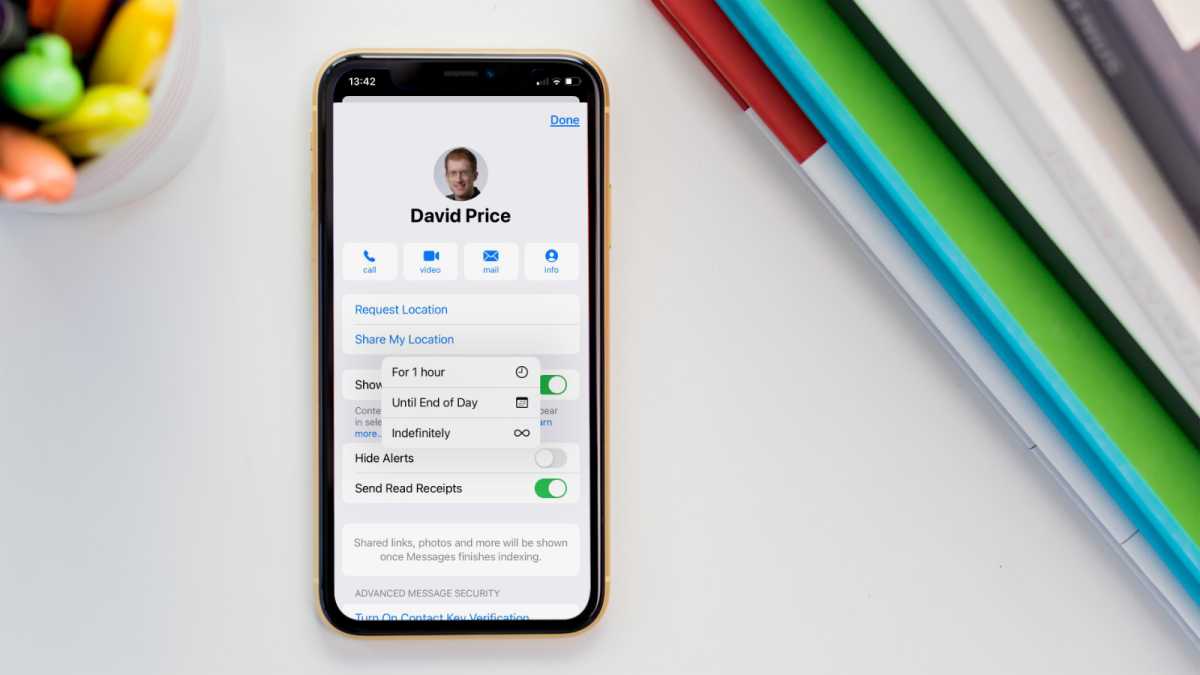
It’s easy to share your location from the Messages app. Here are the steps:
- Open a conversation with whom you want to share your location
- Tap their profile picture at the top of the conversation
- Select Share My Location
- Choose the duration (1 Hour, Until End of Day, Indefinitely)
How to see someone’s location in Messages
Now for that person to see your location they need only follow these steps:
- Open a Message thread with you.
- Tap on your profile picture at the top of the thread.
- View a map with your location pinpointed.
- If the location doesn’t show right away tap on the Map to open it and wait while they are located.
Martyn Casserly
Share your location constantly with family or friends via the Find My app
If you want your iPhone to track and report your position at all times to your family and close friends you can do this People section of the Find My app. This started out as a simple location tracker over a decade ago but has grown into a comprehensive way to share your location, see those of your family and friends, not to mention find any lost Apple devices or remotely delete them if you think they have been stolen.
To add a friend or family member to the Find My app you need first to share your location with them.
- Open Find My.
- Tap on People.
- Tap on the +.
- Choose Share My Location.
- Locate the person you want to be able to track you.
- Ask them to do the same for you.
We have a detailed guide on how to use the Find My app, which covers all of the above. So take a look at that if you want to enable the most powerful tracking app on your iPhone. It’s best thought of as a set-and-forget style feature, as once it’s on you don’t have to do anything with it unless you want to disable the location sharing.
Sharing location once via Messages and Maps
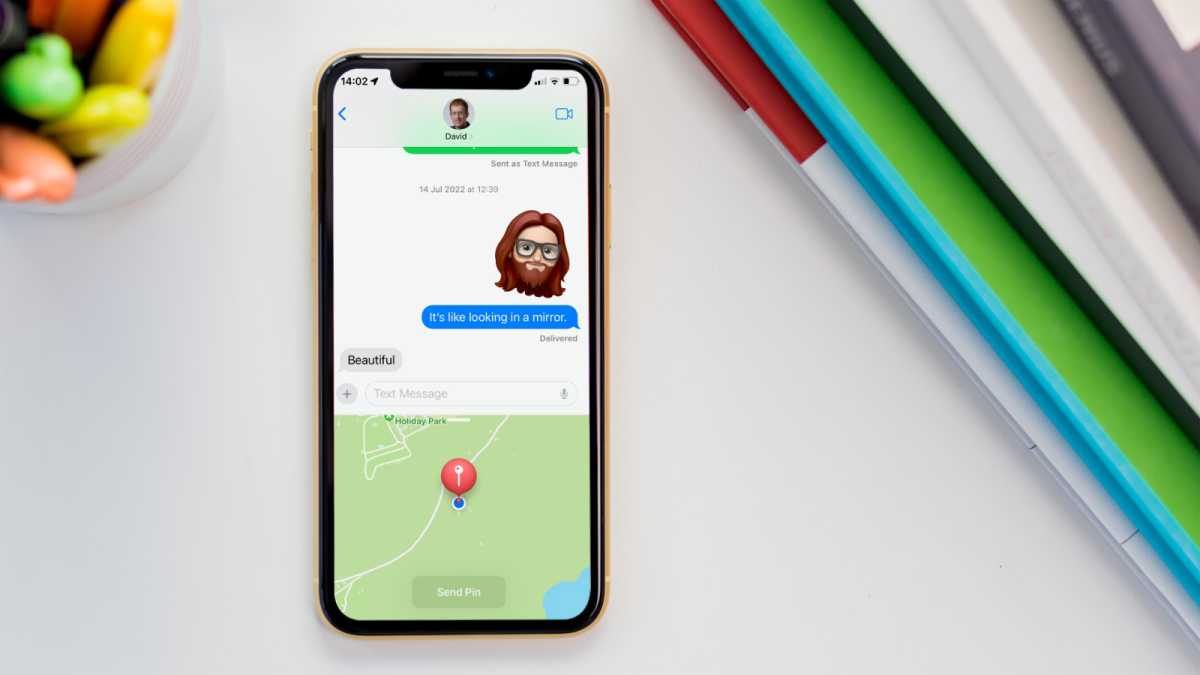
It might be that you don’t want people constantly monitoring your position, but it could prove useful in a single instance. If that’s the case, then it can be done either through Messages and Maps. Note, this isn’t constant tracking, instead it just shows where you are when you send the message.
Here’s how to one-time share your current location:
- Open an existing conversation with the person in Messages or start a new one
- Select the + button in the bottom left corner then choose Location from the list of options
- Next, you’ll need to tap the Map Pin button
- Select Send Pin
- Finally, send your message and the recipient will know where you are
Martyn Casserly
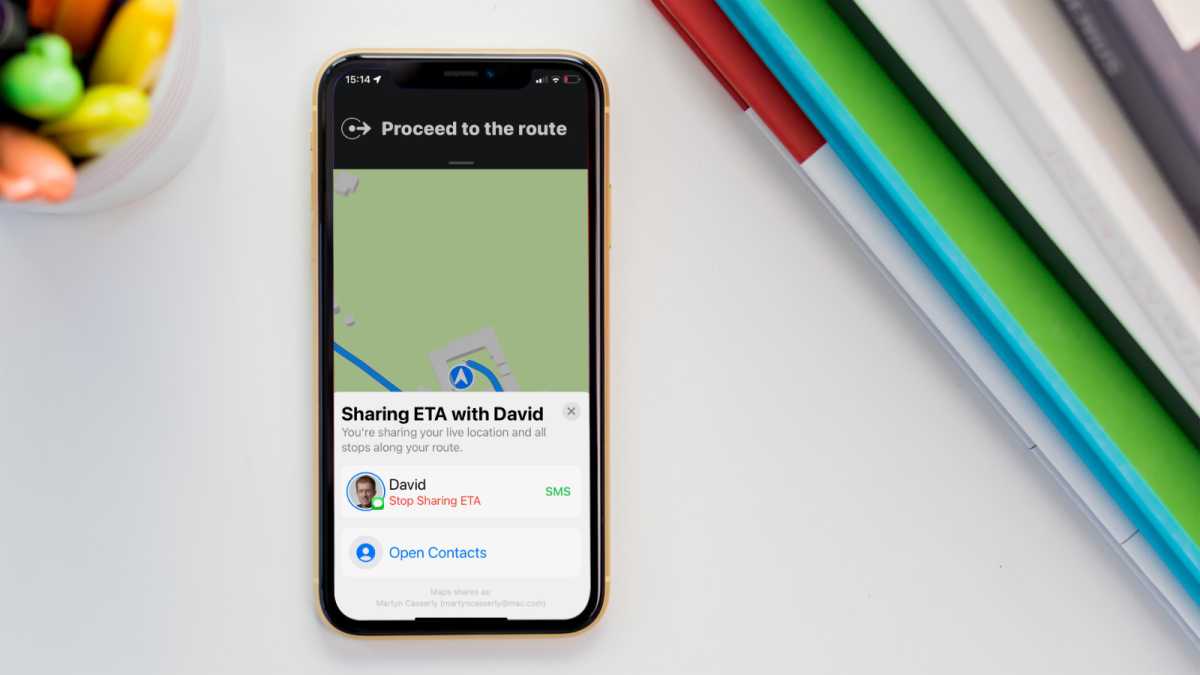
Share when you’ll be arriving somewhere via the Maps app
Another useful feature is for your iPhone to use your current location and traffic or transport details to calculate when you’re likely to arrive at a destination. This is particularly handy if you’re on your way to a meeting or event and don’t want to have to keep giving updates to those who are waiting for you to turn up.
To share your estimated time of arrival, follow these steps:
- Open the Maps app
- Search for your destination
- Select the route card that appears at the bottom of the screen
- Choose the Share ETA option
- If you can’t see this, then you may need to enable it in Settings > Maps
- Select the contact or contacts with which you want to share your ETA
Martyn Casserly
Share when you reach a destination via the Check-In feature
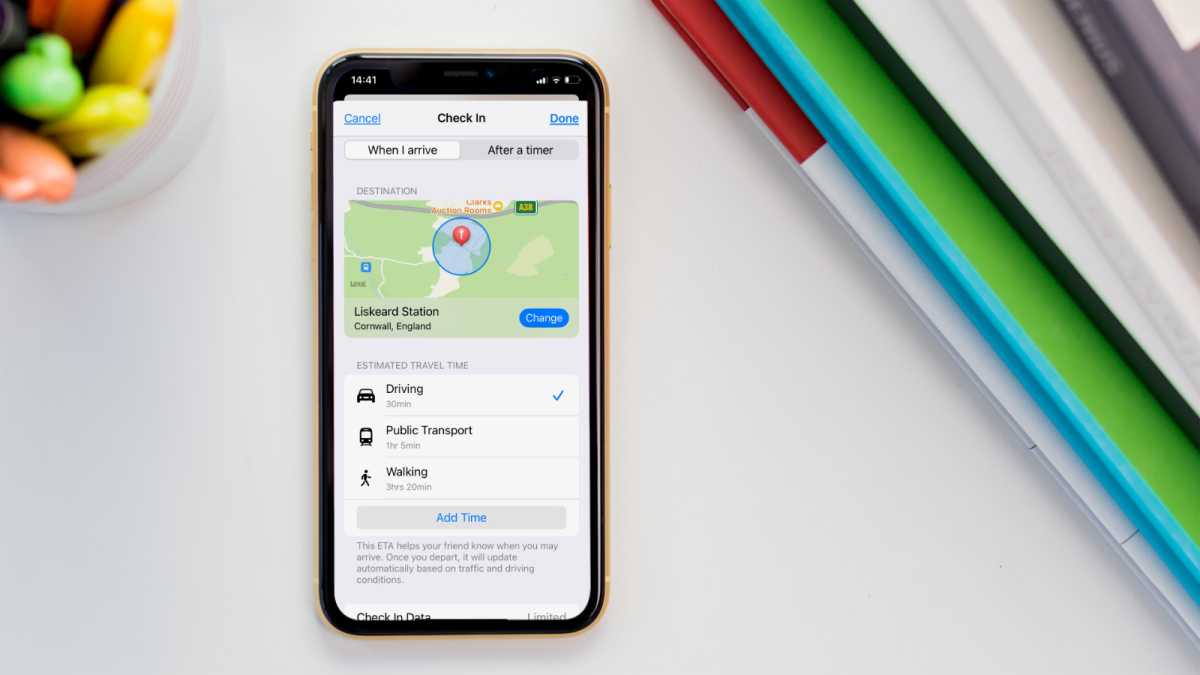
If you’re travelling somewhere unfamiliar or maybe alone at night, the Check-In feature will let friends know when you safely reach your destination. It also allows you to share your ETA or set a specific time when you should get to the end of your journey. This way, if you don’t reach the destination by then, your friends can call to see if you’re ok. It should be noted that Check-In is only available in iOS 17 and later.
To use Check-In, here’s what you need to do:
- Open a conversation or start a new one with a contact
- Tap the + button to the left of the text entry field
- Select More > Check-In
- You’ll be given some instructions about the feature, just tap through these
- Choose either Full or Limited data sharing (we recommend Full)
- When the yellow box appears in the message, tap Edit
- Enter your intended location
- Choose either When I arrive or After a timer
- If the latter, set a timer
- Tap Done and send the message
Martyn Casserly
There you go, a few ways to send your location from your iPhone to your friends and family. To avail yourself of all the features mentioned, you’ll want to upgrade to iOS 17 and have a compatible iPhone. Should your current device have aged out, here’s our roundup of the best iPhone deals so you don’t miss out.


