Nothing sets the new AirPods Pro apart from normal AirPods quite like active noise cancelling, which uses microphones to block the sound of the world around you, allowing you to focus on your music or work.
Active noise cancelling immediately works when you first plug your AirPods Pro in your ears, but Apple provides several methods of controlling it beyond that. You can quickly turn the feature on and off with the AirPods themselves, you can control it through Settings or Control Center, and you can even run a test to see if you’re using the optimal ear tips. In this how-to, we’ll show you how to do all of this.
One note, though: When I say you can “turn off” noise cancellation, I usually mean you can turn on “Transparency” mode, which uses the microphones to let in the sound of the outside world rather than blocking it out.
Unlike the normal AirPods, AirPods Pro come with rubbery ear tips, so you’ll always have so-called “passive noise cancellation” that blocks outside sound simply because you’ve got something stuffed in your ears. This is why transparency mode is so useful.
How to use Siri to turn noise cancellation on or off
The absolute easiest way to turn on noise cancellation, turn on transparency mode, or turn off both features is to simply ask Siri. Just say (depending on the situation):
- “Hey Siri, turn on/off noise cancellation”
- “Hey Siri, turn on/off transparency.”
And you’re good to go.
How to turn noise cancellation on or off on the AirPods Pro themselves
Apple makes it easy to use the physical AirPods Pro to turn active noise cancelling on and off. Once you’ve got the AirPods Pro out of the case, in your ears, and connected to your iPhone:
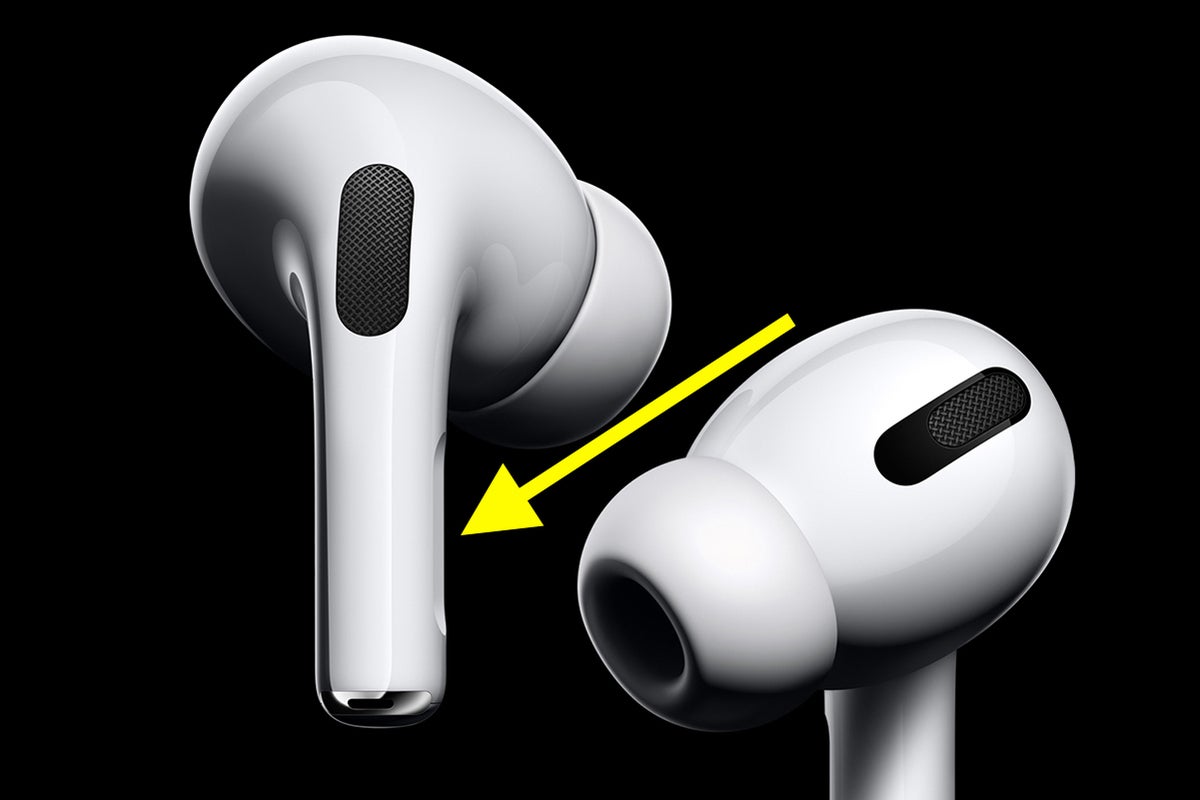
Reach up to and feel for the groove along the stem of your AirPods Pro and hold it down. Don’t tap it, as that will merely pause whatever audio track you’re playing.
You should then hear a high-pitched chime signaling that Noise Cancellation has switched off. Your AirPods are now in Transparency mode.
To turn noise cancellation back on, simply repeat the steps. When noise cancellation activates again, you’ll hear a low-pitched chime.
By default, a long press on the stem will only activate either noise cancelling or transparency mode. If you’d like to add the third option to turn off both noise cancelling and transparency mode with a long press, go to Settings > Bluetooth on your iPhone and pressing the encircled “i” next to the listing for your AirPods Pro.
Under Press and Hold AirPods, you’ll see options for both the left and right AirPods. If you press Left, for instance, you’ll see an option for Siri or Noise Control. Press Noise Control, and you’ll see three options for Noise Cancellation, Transparency, and Off. Off should be unchecked, so toggle it on if you wish. The next time you try to switch cycles with left stem, you’ll hear an especially low-pitched chime, and this is the one that signifies that both noise cancellation and transparency are off.
One smart way to use this feature is to make your left bud only activate the “Off” function, so you can reach for it if you’re trying to save your battery by not using the other features. You’d use the right bud for switching between the two other modes.
If you follow the same steps above and press Siri, your AirPod will now activate Siri instead of activating noise cancellation. It’s hard to recommend this, though, as “Hey, Siri” works fine on the AirPods Pro without manual input.
How to turn noise cancellation on or off through Control Center
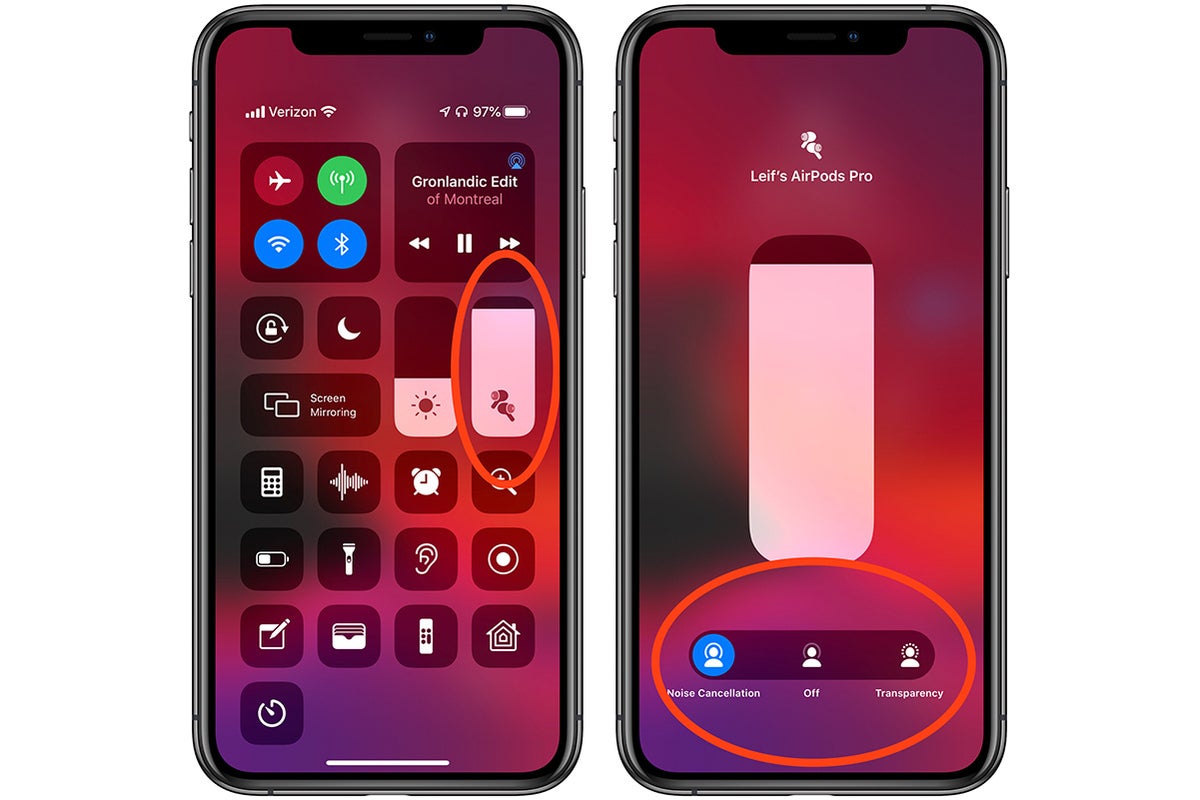
You can also use Control Center to activate either noise cancellation or Transparency mode.
Open your iPhone’s Control Center. If you’re on a Touch ID phone, swipe up from the bottom of the screen. If you’re on a Face ID iPhone, swipe down diagonally from the upper right of the screen.
Next, hold down on the volume control, where you should see an icon representing the AirPods Pro.
At the bottom, you’ll see an option for Noise Cancellation, Transparency, or Off. Press the one you want.
How to turn off noise cancellation through Settings
If you want alter your AirPods’ Pro noise cancellations settings the “long way,” your iPhone’s Settings app is where you want to go. As we’ve seen above, it’s also the best destination to visit if you want full control over your functions of your AirPods Pro.
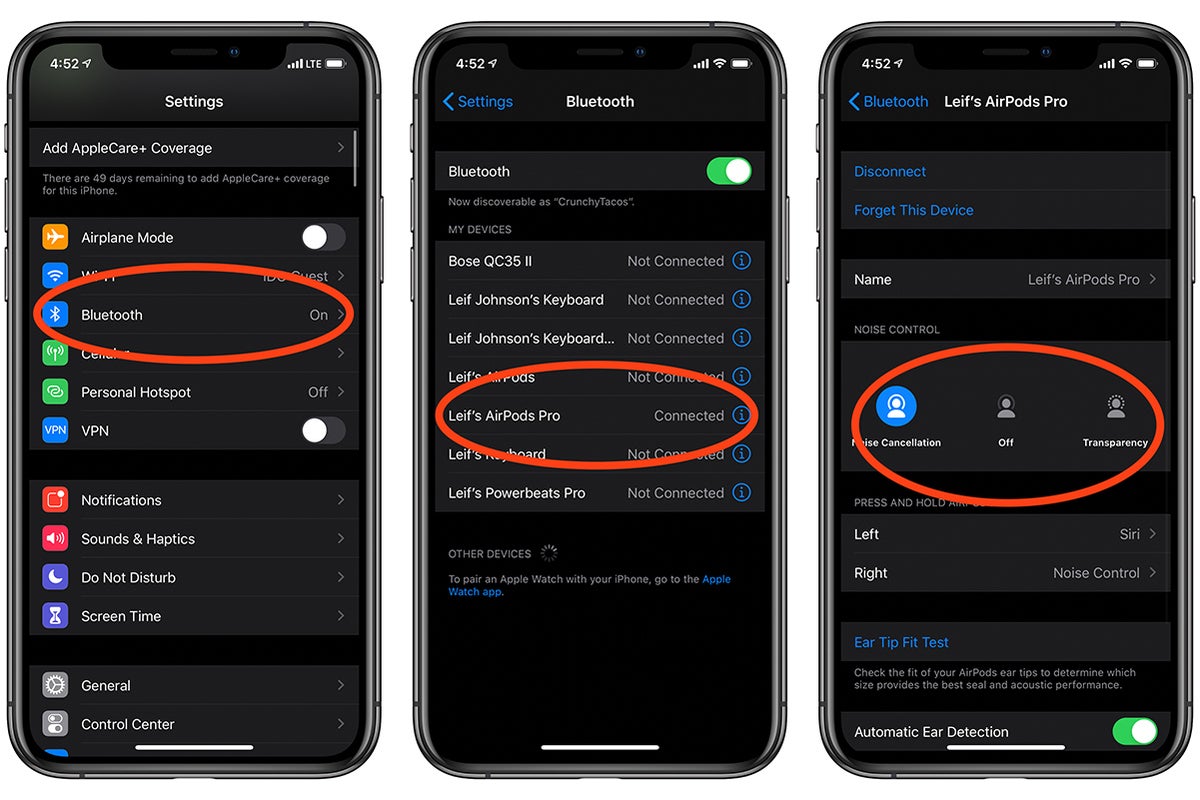
Launch the Settings app.
Press Bluetooth.
Tap the information icon—a blue “i” surrounded by a circle—next to the entry for your AirPods Pro.
Under Noise Control in the menu that pops up, you’ll see three options: Noise Cancellation, Transparency, and Off. Pick the one you want.
How to make sure you’re using the best ear tips for noise cancellation
The AirPods Pro come with three different sizes of ear tips, and Apple designed a little test to make sure you’re using the optimal ones for blocking out sound with noise cancelling.
To use it, head to the Settings app by following the steps in the previous section.
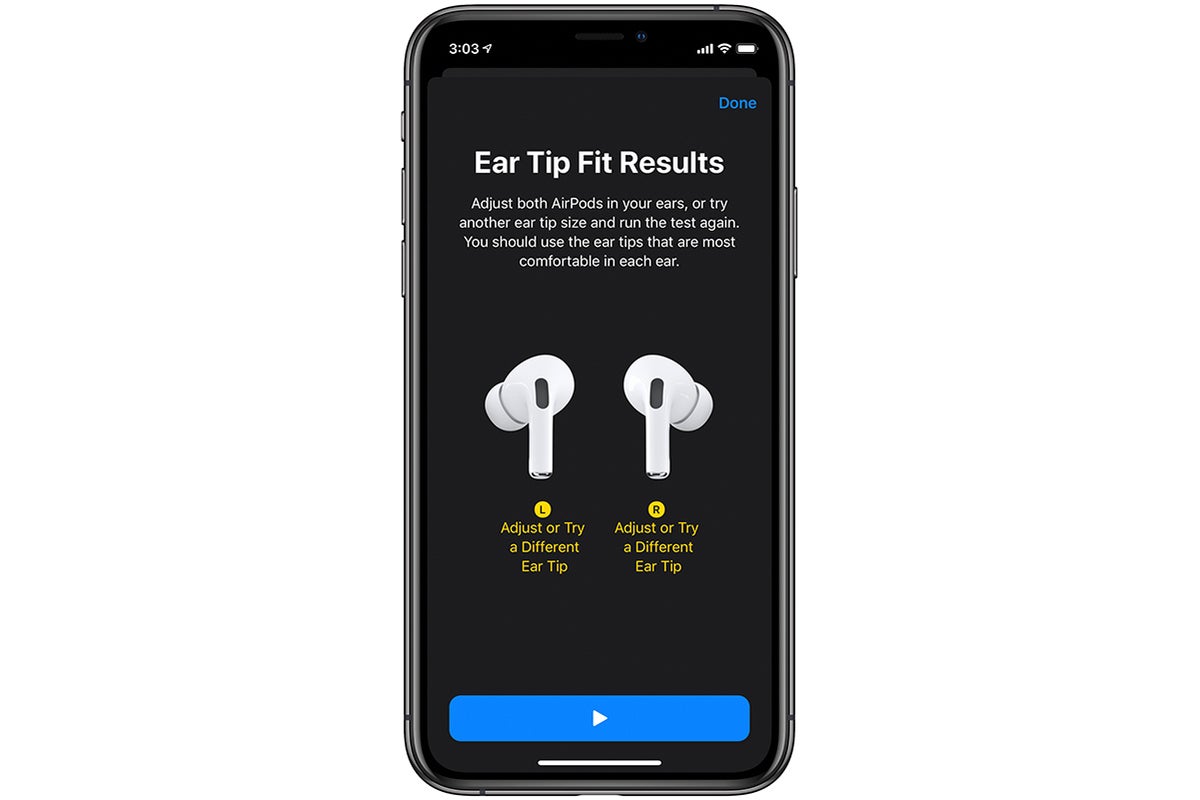
Once you’re in the menu for your AirPods, scroll down to Ear Tip Fit Test and press it.
Press Continue in the next menu, which should be titled “Test the Fit of Your Ear Tips.”
The actual test should then pop up. Press the Play icon at the bottom (the right-facing arrow on the blue button).
Your iPhone will play a track for about four seconds. If you’re wearing the right tips for your ears, you’ll see “Good Seal” pop up under the icons for your AirPods Pro once it’s finished. If you’re not, you’ll see a yellow warning that says “Adjust or Try a Different Ear Tip.”
If you don’t need to switch out your tips, you’re good! If you got the yellow warning, though, remove the tips and try again with a different set.
Note: The tips are tightly clamped to the AirPods Pro, so don’t be afraid to tug them a little roughly in order to remove them.


